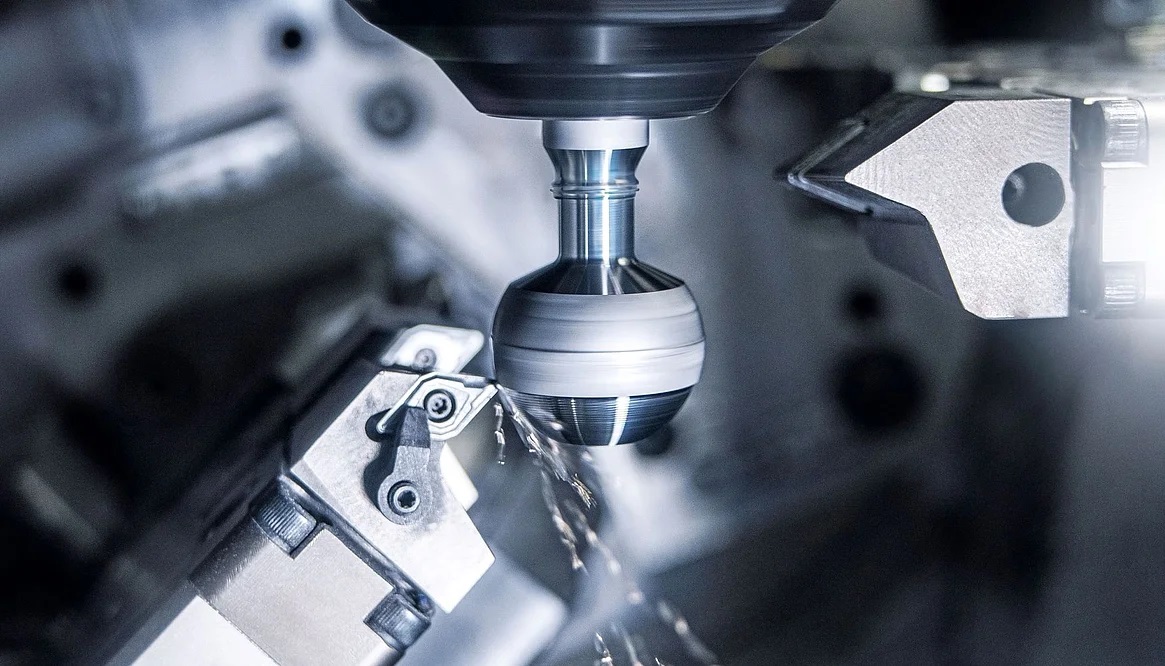
The tools for machining the neck are located on the right-hand side of the compound slides and the tools for machining the ball are located on the left-hand side.
In this context, ball pins and ball sleeves are among the safety-critical car components that must leave production with a high surface quality and micrometer precision without exception - despite high quantities and general cost pressure. How can this task be implemented particularly efficiently and with minimal chip-to-chip times? EMAG now has the answer with a new machine: using the VST 50, a finished ball pin leaves the machine every seven seconds with each component undergoing an exceptionally comprehensive measurement.
It is a new task for the turning specialists from southern Germany - until now, ball pins were not a typical automotive component that passed through an EMAG machine. So how did this design and development come about? "It has to be said that the task sounds very much like EMAG in many respects. It involves large quantities, special surface requirements and low unit production costs. We repeatedly ensure these qualities for various components," explains project manager and development engineer Frank Haas from EMAG. “In this respect, it was obvious that a major customer approached us with this task some time ago. The main question was whether we could exceed the performance values of existing machines in ball pin production. This was the starting point for the development of the VST 50.”
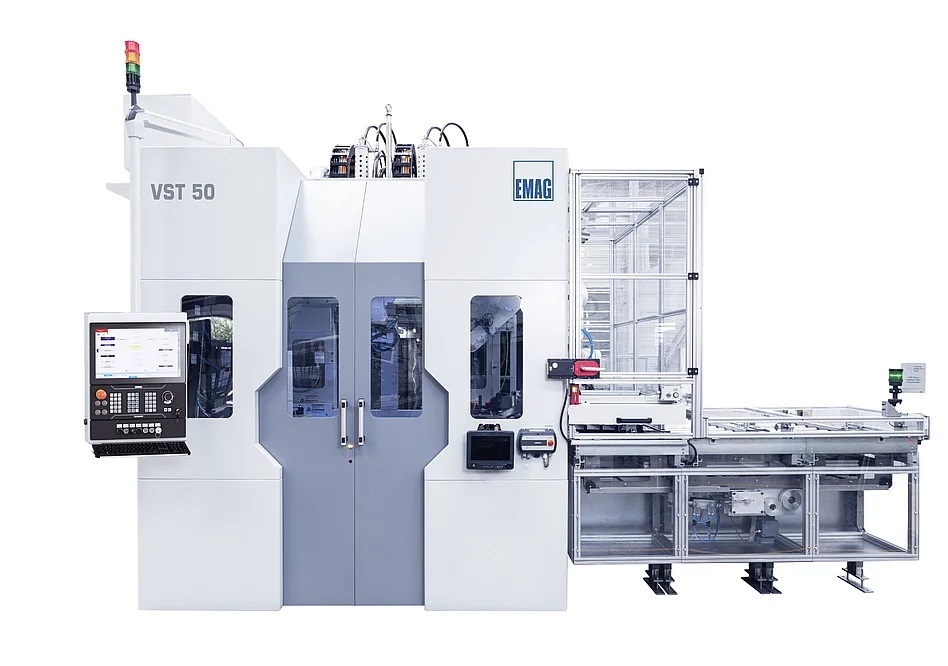
The result has now been available for some time and a simple look at this machine makes it clear: the designers have done a particularly good job here. On the one hand, the VST 50 has highly automated processes, including the use of three robots. On the other hand, it is easy to operate using the EDNA apps, which also include various measurements and the robots. For the actual turning of the ball and neck of the ball pin (only these areas are involved here), there are two suspended workpiece spindles that can be moved irrespective of each other. As a result, one spindle is always loaded and unloaded while the other is in use during the machining process. The associated tool compound slides are split in two: the tools on the left-hand side are mounted on a rotary B-axis, which enables the ball to be turned and smoothed with precision. In addition, the ball diameter and shape can be adjusted using a linear U-axis. Special tools for neck machining are mounted on the right-hand side.

Focus on high-precision surfaces: The new VST 50 from EMAG ensures high-speed machining of ball pins.
High-productivity loading
Loading and unloading are in turn carried out by the three robots, which are arranged in parallel in front of the machine. Each is responsible for a different sub-process: The left-hand robot handles the workpiece between the transfer station and the first workpiece spindle. The middle robot performs the same task on the second workpiece spindle, while the right robot handles the workpiece between the transfer station and the outer automation assemblies. But why not use a robot that performs these three tasks alternately at this point? "That would certainly be possible," confirms Haas. "However, we wouldn't be able to achieve the extremely short cycle times. The various movements are sometimes carried out simultaneously. Our solution ensures that a finished workpiece leaves the machine every seven seconds and the chip-to-chip time is less than two seconds."
Rapid speed and precision - in this context, this also explains why the robots mentioned are also used for tool changes, whereby EMAG has divided the entire process into two parts, so to speak. On the one hand, there is the operator's task: he always sees a prediction for the tool change on the central control panel. If he wants to change a tool, he simply presses a button and the tool magazine swivels outwards for the change. It is important to note that the production process is not interrupted during this process. After the exchange, the magazine swivels back to its starting position. The manual process is now complete and an automated process follows in the second step. To do this, the left-hand robot first puts down its workpiece gripper and picks up a tool gripper. It then removes the worn tool from the interior of the machine and replaces it with a new one, which it takes from the magazine. To further increase process capability, each tool is coded with an RFID chip so that the tool data can be transferred accordingly. The entire tool change takes less than 90 seconds.
Light band micrometer provides many measured values
Finally, there is the issue of process reliability as a key economic factor for a component that must leave production without any error tolerance. Here, EMAG relies on a 100 percent solution: each component passes through a light-band micrometer, which determines the required measured values in fractions of a second, whereby the result is very comprehensive. The final ball and neck diameter is determined and any chips are detected at the same time. In addition, a high-resolution process camera is located directly in front of the loading hatches. Its live image appears on the panel at the touch of a button. The operator can easily chech whether, for example, the chip formation is causing a fault in the process.
Overall, this solution is very flexible, as the VST 50 is basically suitable for both short ball pins (ball diameter 16 to 40 mm, component length 50 to 150 mm) and long ball pins (ball diameter 22 to 35 mm, component length 150 to 455 mm). It can also be used for machining ball sleeves - and all at the enormous speed mentioned above. According to EMAG estimates, the VST 50 is around twice as fast as other production solutions for this component, which of course also reduces unit production costs. A perfectly measured component leaves the machine at breakneck speed. The EDNA apps always enable largely intuitive operation. "We are taking the production of ball pins to a new level," says Frank Haas, summarizing the result. "In this context, we are convinced that this machine will be very well received by the market - and by other industries too, because ball joints are not only found in cars."

 Login/Register
 Supplier Login


